Comparing Cheap and Expensive Digital Calipers
Gareth's Tips, Tools, and Shop Tales - Issue #112
I’ve been getting a great response to the new “Tips Busters” feature. See the first installment below, and in “Shop Talk,” see a call for a tip to bust (Does using tape to prevent tearout on a table saw actually work?). Can anyone here take this one on?
Comparing Cheap and Expensive Digital Calipers
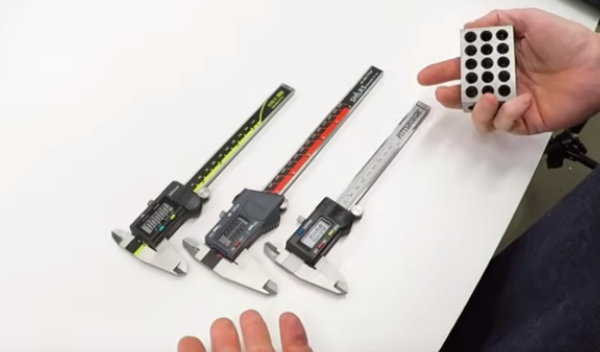
In this Clough42 video, James looks at digital calipers at 3 different price points and asks if the expensive ones are worth it. He raises some good points here, like the fact that, for most non-precision measuring (e.g. general shop use, woodworking, hobbies, etc.), an inexpensive set of calps is perfectly fine. Is being a half-a-thousandth of an inch off worth spending ten times as much? Where he argues you might want to spend more on a more expensive tool is for the quality of the manufacturing, the feel of the tool, and some of the higher-end features of an expensive tool. Personally, while I would love a pair of $150 Mitutoyo calipers, I don’t need them for 95% of the work I’m doing. I usually reach for my $9 TackLife calipers for most measuring, or if I want to feel a bit more confident, I use my $42 iGaging calipers. For most of us, we don’t need to spend more than $50 on a pair of calipers.
Tips Busters: Reviving Felt Pens? CONFIRMED!
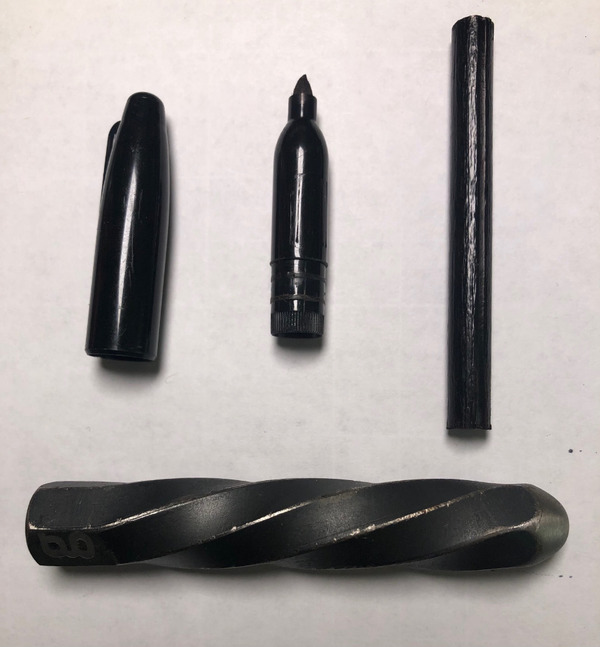
Here is the first tested tip. In the first volume of my Tips and Tales from the Workshop, I included a tip on reviving felt alcohol-based ink markers. The tip claimed that the alcohol frequently evaporates before the ink is exhausted. By “adding a few drops of isopropyl alcohol,” you can bring the pen back to life. In response to the book, several people asked if this actually works. I have now tried it and yes, it does.
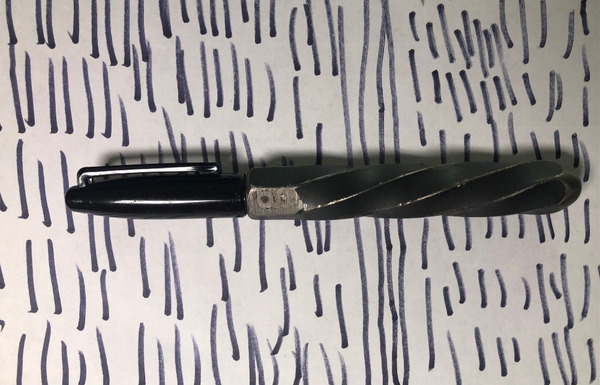
I have a lovely Greg’s Garage modified Sharpie that had dried out. At first, I tried “a few drops” of IPA. The next day, I marked a sheet of paper with lines. The pen only worked for about a half a page of marks. The next day, I poured some IPA over the felt cartridge and redid the test. This time, I got two days of ink out of it (covering a full 8-½ x 11 piece of paper each day). Next, I placed the cartridge in a small jar of IPA for an hour to thoroughly soak the felt. I’ve now been drawing lines with it each day (a page per day) for 5 days. Below is the 5th day. It’s started to dim a little, but the point is, you can bring a felt tip pen back from the dead and get a few more days/weeks/months out of it (depending on how frequently you use it). But, you want to soak the felt, not just use a few drops.
Laser Engraving in Color
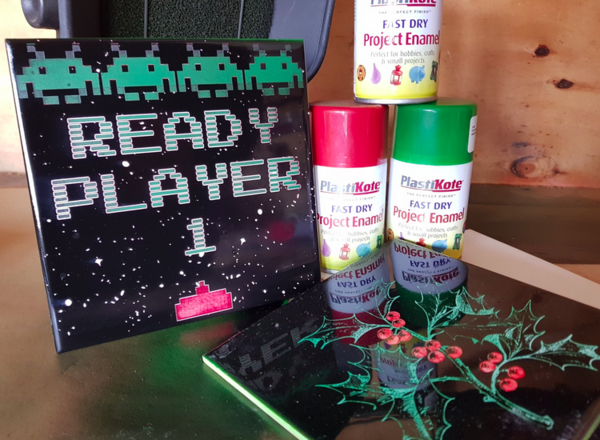
My maker pal, Andrew Lewis, shared this on Twitter:
“Here’s a trick I tried last year. You can lay down multiple layers of colored enamel paint onto a surface, then etch them back one layer at a time to get multi-color effects.”
Making a Sandpaper Organizer
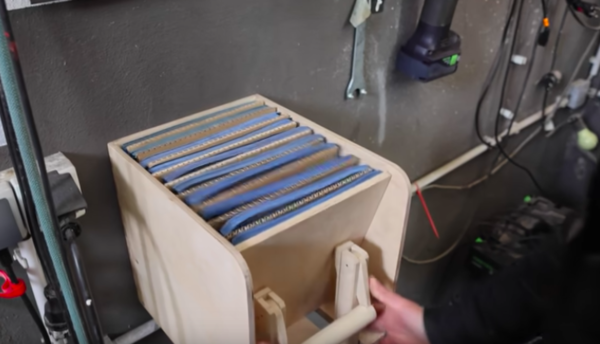
Like a lot of makers, Laura Kampf has struggled with an efficient way of storing and accessing her significant sandpaper supply. As she points out, in the winter weather of her shop in Germany, the paper likes to curl. And when you have stacks and stacks of paper, accessing the grit you need can be an annoyance. Her solution is a pair of wooden boxes where the paper is under tension until you need to rifle through it like record store flip bins to find the grit you desire. Ingenious.
Maker Slang
Looking at the jargon, slang, and technical terms of making.
Perennial Shop Tips from Family Handyman
I love the tips and projects you find in old DIY magazines like Popular Mechanics and Do It Yourself magazine. Many of them are clever and useful (or appear to be). Some are good for a laugh, and some are outright dangerous. Family Handyman has collected 101 tips from yesteryear that their readers claim have stood the test of time.
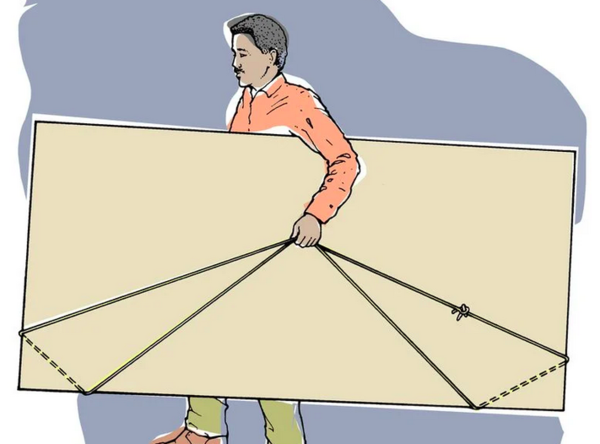
Big Sheet Carrier
You don’t have to struggle trying to lug around full sheets of plywood or drywall. Just tie together the two ends of a length of rope about 18 ft. long. Hook this loop around the two bottom corners of the sheet to form a handle.
Tips for Better Torch Cutting

In this Fireball Tool video, Jason shares some of the techniques and workarounds that he’s developed over years of torch cutting and welding. He covers how to get the right cut with the wrong tip, how to best cut angle iron, cutting square and round tubing, what to do if you can’t read your oxy or acetylene regulator gauge, and more.
Shop Talk
Reader Jim Keith sent me a great candidate for a tip to bust. Anyone want to take a crack at this one? Email me.
“I’ve been told that if you apply masking tape to an area you’re about to crosscut on a tablesaw, it can reduce tear-out. This was probably intended as a cheaper/faster option than “using a sharper/better/ more appropriate blade” or “pre-score the cut.” I’ve used it on plywood, regular lumber, veneers, laminates, and sheet plastics, and never gotten perfect results, but I’ve never really had time to do any testing to see if it’s a placebo or actually effective. I understand that it can actually be helpful with tools other than tablesaws, in that it protects the finish from the foot of a jigsaw (or kickback guards), or provides a better marking surface, but I’ve also seen the tape grab bits of sawdust and drag them into the surface, which was less than helpful. I no longer work for that shop, but I’d love some vindication that Big Masking Tape was behind the tip all along. Alternately, if it’s not ineffective, is there a better tape to use than plain or painters masking, in the sweet spot between ‘keeps tearout minimized’ and ‘doesn’t gunk up blade with adhesive’?“
02/24/22


